Introduction
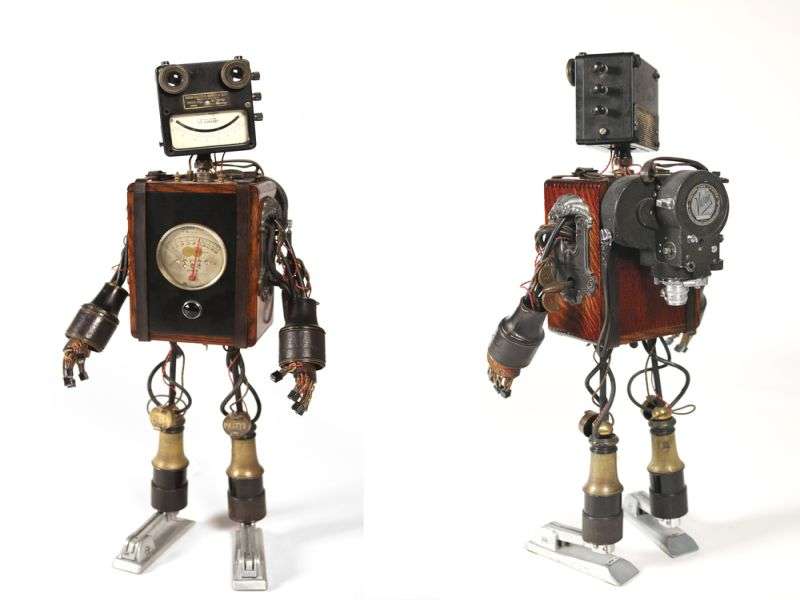
Are you interested in building your own robot but don’t have access to expensive materials or equipment? Look no further, In this blog post, we will show you how to make a robot at home with waste materials. Not only is this a fun and creative project, but it also promotes sustainability by repurposing items that would otherwise end up in landfills. Get ready to bring your very own robot to life with just a few simple steps.

Image by Canva
1. Understanding The Basics of Robotics
Before we dive into the nuts and bolts of creating your homemade robot, let’s take a moment to familiarize ourselves with the fundamentals of robotics. Imagine a robot as an autonomous machine, capable of performing a series of complex tasks all on its own. Isn’t that exciting?
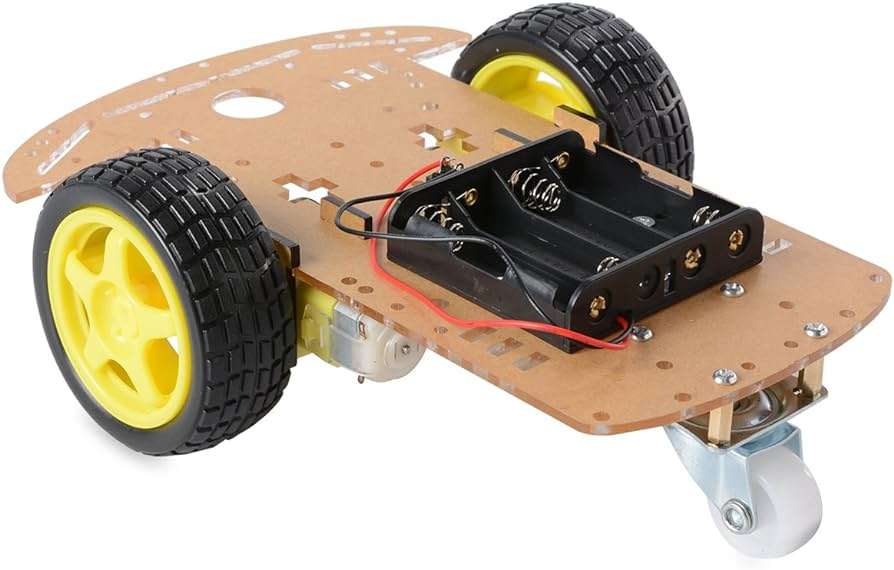
At its simplest, a robot comprises a body, a battery that acts as its heart, and a motor that functions as the legs, facilitating movement. Now, advanced robots come with a slew of other components, such as sensors for object detection, but we’re going to keep things simple for this DIY project. Our robot will be basic, without sensors. It’ll be an elementary yet enjoyable introduction to the world of robotics.
So, keep this basic anatomy in mind: a body made from waste materials, a motor for movement, and a battery for power. With these core components, we are ready to embark on our robot-making journey. Let’s continue to the next step, shall we?

Image by Canva
2. Identifying and Collecting Waste Materials
The journey to building your homemade robot starts with a fun treasure hunt around your home. Your mission? To scout out potential waste materials that can be transformed into your robot’s body. From the forgotten cardboard box tucked away in your storeroom to the empty plastic containers in your recycling bin, these everyday items are about to get a new lease of life. Even discarded bottle caps can play a role in your creation, acting as wheels or decorative features.
The beauty of this project is that you’re not just crafting something new, you’re also reducing waste by repurposing items you’d usually discard. Your robot could sport a body made from an old detergent bottle, arms crafted from toilet paper rolls, and legs from discarded plastic forks – the possibilities are as boundless as your creativity!
But the body isn’t the only component your robot needs. Remember our chat about the basic anatomy of a robot? The motor and battery are key to breathing life into your creation. While a motor can be salvaged from an old toy car that’s lost its appeal, a simple 9V battery should fit the bill as the powerhouse. If you don’t have a spare motor lying around, don’t fret! A quick visit to a local hobby shop should solve that issue.
So, equipped with your list of materials and a sense of adventure, start your scavenger hunt. As you collect each item, you’ll feel a step closer to the thrill of bringing your robot to life. Ready, set, collect!

Image by Canva
3. Designing Your Robot Blueprint
As you embark on this exciting DIY adventure, having a roadmap is crucial, and that’s where your robot’s blueprint comes in. This is where you get to truly tap into your creativity and engineering acumen to design your very own robotic buddy.
Take your time to sketch a simple yet detailed diagram of your robot. Don’t worry, you don’t need to be a Picasso here. A basic pencil drawing will do the trick. Your goal here is to outline how you want your robot to look and identify where each repurposed item will fit into the grand scheme.
Are those bottle caps going to be the eyes? Is the detergent bottle your robot’s torso? How about those toilet paper rolls, are they the arms or the legs? The key here is to visualize your final product and map it out on paper.
Importantly, don’t forget to earmark spaces for the key internal components, the heart and legs of your robot, aka the battery and the motor. These elements will bring your creation to life and should be accurately represented in your blueprint.
Creating this blueprint not only lays the foundation for your robot construction but also gives you a sense of ownership and accomplishment, knowing that the design is entirely yours. Remember, there’s no right or wrong design. It’s your robot, so let your imagination run wild!
With your blueprint ready, you’re all set to embark on the next exciting phase – assembling your robot’s body.

Image by Canva
4. Assembling the Robot’s Body
The anticipation is palpable as you’re about to transform your design into reality. Starting with your repurposed materials, meticulously cut them down to the desired sizes as outlined in your blueprint. Whether it’s reshaping an old detergent bottle or trimming down toilet paper rolls, remember that precision is key. This is your robot’s anatomy we’re building, after all.
Next up is the assembly process. This stage brings together all the various components of your robot’s body – from its head to its toes. Grab a sturdy adhesive, as it’s time to give your robot some form and structure. Glue each part carefully, making sure every piece aligns with your blueprint. Is that detergent bottle sitting straight? Are the toilet paper roll arms evenly attached? Take a moment to check and recheck each step.
Throughout this process, it’s important to remember one thing: strength is crucial. These glued joints are what’s going to keep your robot intact, allowing it to move and function. Use sufficient adhesive and let each part dry properly before moving on to the next. This is not the stage to rush; patience is your friend here.
As you slowly see your robot’s body come together, you’ll feel a sense of pride. You’re not just creating a toy; you’re bringing your creative vision to life and learning about the fascinating world of robotics along the way. Remember, each step is a learning experience and a chance to put your engineering skills to the test.
With a firm and sturdy body ready, you’ve successfully passed a major milestone in your robot-building journey. But hold your excitement, we’re not done yet. The next phase is waiting, where we breathe life into your creation by installing the heart and legs – the motor and the battery. Onwards, to the next step!

Image by Canva
5. Installing the Motor and Battery
The stage is set! You have assembled your robot’s body and now it’s time to put the motor and battery in place, the components that will bring your creation to life. Let’s start by mounting the motor. The exact spot depends on your unique design, but generally, you’ll want to attach it to the robot’s base or where the legs or wheels are set to be. Ensure that the motor is secure and in alignment with your design for smooth movement.
Moving on to the battery, this is what will provide the power for your robot. Connect it to the motor using wires, paying careful attention to the polarity. That means connecting positive to positive and negative to negative. Remember, batteries are sensitive components, so it’s crucial to handle them gently and ensure a proper connection.
It’s a moment of magic as you see your once pile of waste transform into a moving machine. But before you marvel at your creation, make sure everything is securely in place. Is the motor securely fastened? Is the battery connected correctly? Your due diligence here will pay off when you see your robot spring into action.
This step isn’t just about installing the components, it’s about breathing life into your robot. So, gear up and get ready for the moment of truth – it’s time to put your engineering skills to the ultimate test, Hold onto your excitement though, because there’s one more crucial step to go – testing your robot.

Image by Canva
6. Testing Your Robot
With your robot fully assembled, it’s now time to step into the testing phase. Let’s flip the switch and set your robot in motion. Keep a keen eye on your creation as it begins to move. Is it rolling or walking as you anticipated? If it seems a little off, don’t worry – it’s a part of the process.
Delve back into your robot and investigate. Revisit your motor placement and double-check your wiring connections. Small adjustments might be needed to perfect your robot’s movements. Don’t shy away from tweaking your design or repositioning components; it’s all part of the adventure!
This stage is about trial and error, and that’s where the real learning happens. So, embrace it. Roll up your sleeves, tinker with your robot, and keep testing until you’ve got your robot moving just the way you want. Remember, every great inventor has had their share of tests and trials, and you’re no different. So, go ahead, flip that switch and let’s see what your homemade, waste material robot can do and we hope you get the perfect answer of how to make a robot at home with waste materials.
Video by Irfan’s Idiotic Ideas YouTube Channel
Conclusion: How to Make a Robot at Home with Waste Materials?
In conclusion, how to make a robot at home with waste materials, making a robot at home with waste materials is not only an enjoyable and educational DIY project but also a sustainable and environmentally friendly way to explore the fascinating world of robotics. By following the step-by-step process outlined in this guide and unleashing your creativity and ingenuity, you can create a robot that not only performs useful tasks but also reflects your unique vision and personality.
FAQs
1. Can I make a robot at home even if I’m not an expert in robotics?
Absolutely, DIY robotics is accessible to makers of all skill levels, from beginners to experts. With the right materials, tools, and guidance, anyone can create their own robot at home.
2. How much does it cost to build a robot using waste materials?
The cost of building a robot with waste materials can vary depending on the materials and components used, as well as the complexity of the design. In many cases, you can create a basic robot using materials you already have at home, making it a cost-effective DIY project.
3. Are there any age restrictions for making a robot at home?
DIY robotics is suitable for makers of all ages, from children to adults. However, younger makers may require supervision and assistance from adults, especially when working with tools and electronic components.
4. Can I recycle old electronic devices for my robot project?
Absolutely, Recycling old electronic devices such as smartphones, remote-controlled toys, and electronic appliances is a great way to repurpose waste materials for your robot project. Just be sure to safely disassemble and remove any hazardous components before incorporating them into your design.
5. Where can I find step-by-step tutorials for building different types of robots?
There are numerous online resources and communities dedicated to DIY robotics, offering a wealth of tutorials, guides, and instructional videos for building all kinds of robots. Platforms such as YouTube, Instructables, and robotics forums are excellent places to start your search for inspiration and guidance.
